
Want to know who’s calling you without taking your phone out of your pocket? That’s easy – assign a ringtone to a contact. But what about doing it all silently? Not only can you assign a custom ringtone or text tone to a contact, you can even give them a custom vibration pattern.
How to assign ringtones, vibrate for specific contacts on iPhone
Follow the steps given below to have customized ringtone for contacts :
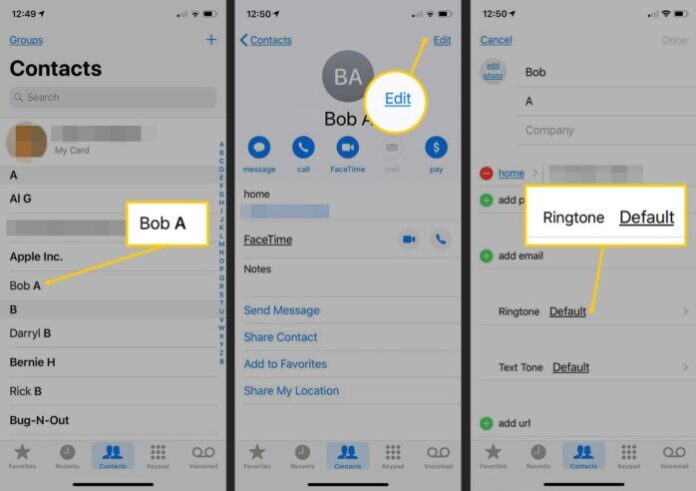
Step 1: Open Phone app and select the “Contacts“. Then click on the “Contact” to which you want to assign a ringtone.
Step 2: On selecting the contact, details for that contact will open up. Click on “Edit” at the top right corner of the screen.
Step 3: You will see a Ringtone option, you click on it.
Step 4: You’ll be able to see all the ringtones added to your iPhone in the “Ringtones” section. Select the desired one by click on it.
Step 5: From this screen itself, you can also change the “Vibration” for a specific contact.
Step 6: Click on “Vibration” and select the one you wish. After that, go back to the previous screen by tapping on the back button at the top left corner.
Step 7: Once you’re satisfied with the ringtone and vibration, click on “Done” at the top right corner of the screen.
Step 8: If desired you can also change the notification tone for text messages from that contact. To so click on “Text Tone” .
Step 9: Select the desired ringtone and vibration for texts.
Step 10: In order to save the changes, click on “Done” at the right corner of the screen.
With this, the selected ringtone and vibration is assigned to the contact. By default, every contact uses the ringtone that is set in the Settings but the one assigned from here overrules the default one. Similarly, you can follow the same method and assign a different ringtone for other contacts. Also, you can refer to the create custom vibrations for iPhone ringtones. Wish you are succesful!